How To Fix Keurig 2.0 Water Under Pressure
If you Keurig 2.0 is displaying a water under pressure error, then you’ll need to unclog your machine’s needles to get it working again. It is easiest to do this with the orange tool that came with your coffee maker. Keep reading to learn what you need to do get rid of the Keurig water under pressure error message.
Why Your Keurig Machine Says Water Under Pressure
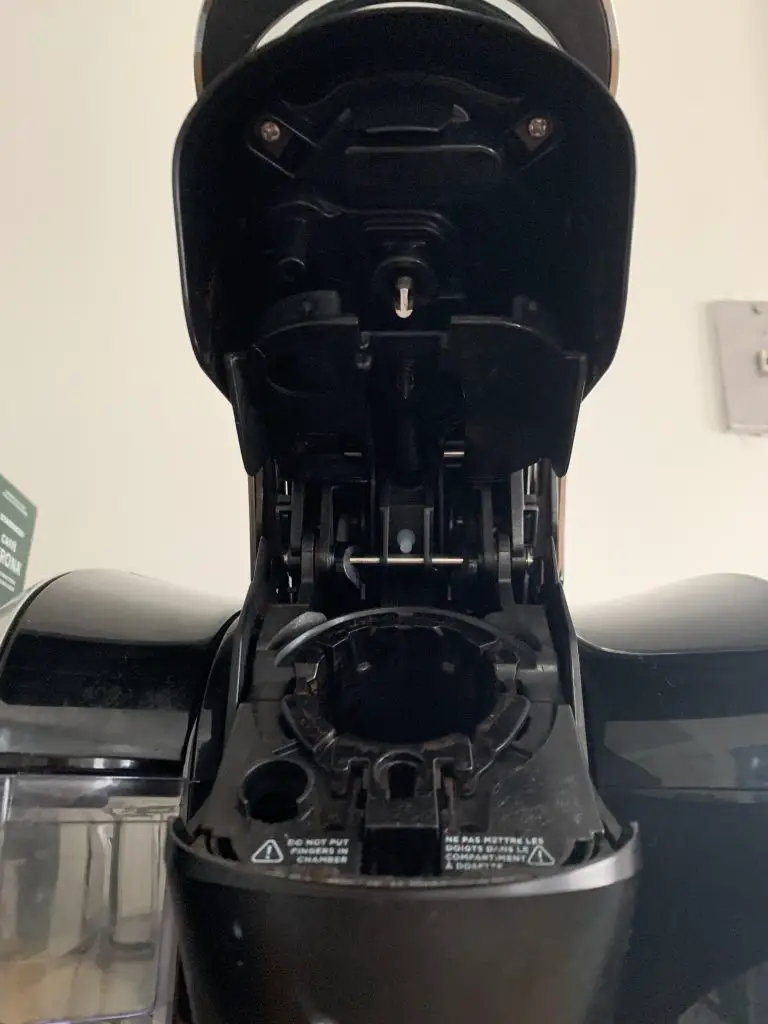
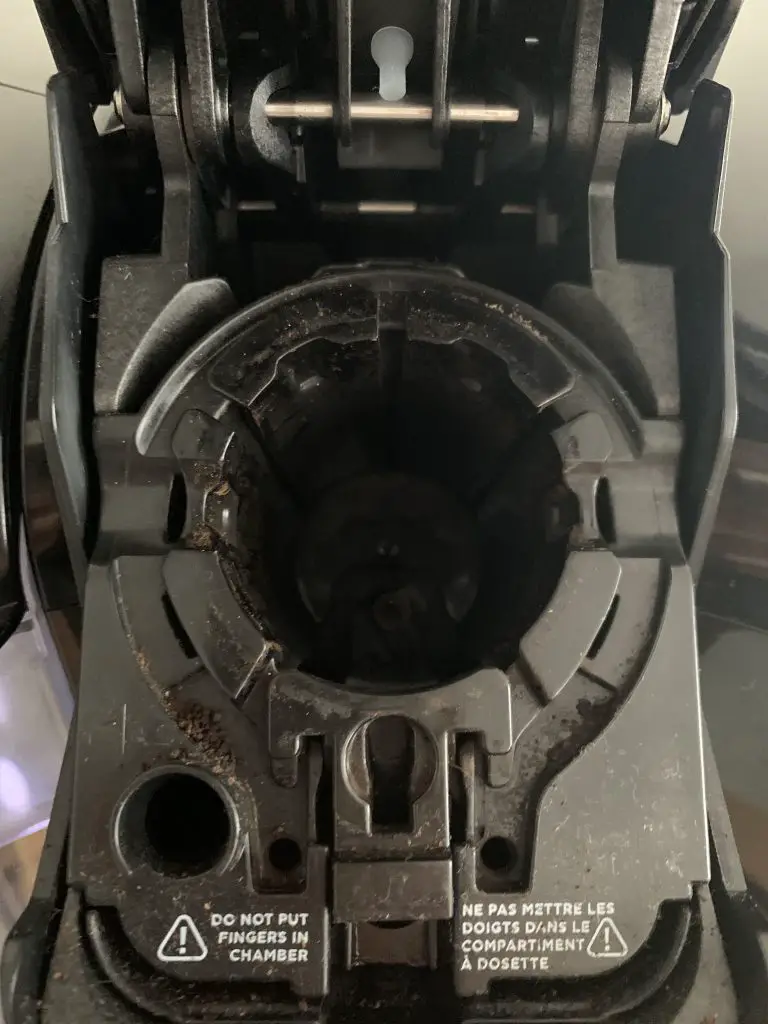
When you begin to brew a K-cup, there is a needle inside your coffee maker that punctures the top of the pod. This allows hot water to pass through the capsule and eventually make its way to your cup. The coffee grounds can get stuck around the needle and eventually become dry and hard. This is especially likely to happen if you don’t discard your pods soon after brewing. As a result, the ground coffee build up starts to block the flow so that the machine cannot generate enough of the water pressure needed to brew the coffee pod.
Signs Of A Keurig 2.0 Clogged Needle

If you are reading this article, then you are probably already seeing a Keurig water under pressure error message. However, there are early warning signs that your machine has a clogged top needle; look out for these in the future.
If your coffee starts to taste bitter, it is probably because old brewed coffee grounds are falling from the needle into your cup of coffee. You may even be able to see them in your coffee mug.
Another early warning sign is that your machine starts to take longer to brew. The build up of coffee grounds in the needle will increase the time it takes for the filtered water to move through your machine.
How To Clean The Keurig 2.0 Needles
The easiest way to do clean Keurig 2.0 needles on a regular basis is with the orange brewer accessory tool. Most models will come with one. However, if you lost yours you can buy a new one for just a few dollars.
How To Clean Keurig Needle Using The Orange Maintenance Accessory:
- Turn off the power. Unplug the machine from the wall.
- Fill the silicone bulb in the middle of the brewer maintenance accessory with water.
- Lift the handle to open your brewer. Place the maintenance accessory in the pod holder. Make sure the arrows on the ring are pointing down. Push firmly down.
- Raise and lower the handle five times to draw out coffee grounds.
- Remove the brewer maintenance accessory. If you look inside the bulb, you’ll see the coffee grounds that were removed.
- Perform a cleansing brew. You can use only water and no pod or, preferably, you can insert a cleansing rinse pod. Use your touchscreen to brew a 6 ounce cup, letting the hot water or cleansing rinse flow through the machine. When done, discard the cup’s contents.
- Clean the maintenance accessory by washing with warm water and let it air dry.
- Put the pod holder back into the machine. Make sure it clicks. Then put the water tank back in place.
The Paper Clip Cleaning Method
If for some reason you are unable to get the orange maintenance tool, a DIY alternative is to use a paper clip. To do so follow these steps, while using caution around the sharp needles.
- Straighten one end of a paper clip.
- Turn off the brewer and unplug it and remove the water reservoir.
- Grab the sides of the pod holder and remove it from the brewer by gently pulling away.
- Press the button on both sides to separate the holder from the housing. Push the lever to show the exit needle, then hold it down while flipping the holder over.
- Insert the straight end of the needle and then move it around in a circle a few times. Rinse the pod holder with water and set it aside.
- Open the handle and look underneath to see the top entrance and exit needles. Insert the paper clip in each and move it around to clean.
You can watch a video on how to clean using a paper clip.
Keurig 2.0 Needle Gasket Replacement

If cleaning wasn’t successful or you simply don’t want to bother with it, an alternative would be to replace the needle gasket. This would be much cheaper than buying a new machine.
There are over four thousand positive reviews as of March 2022 for this Keurig 2.0 needle gasket replacement on Amazon. The part is easy to install – just take out the old housing by pushing up from the bottom and drop in the new one. The needles are sharp so please use caution.
Additional Keurig Troubleshooting
If your Keurig is still not brewing after needle cleaning, you may need to descale your brewer with a descaling solution. This process will remove mineral build up from the tap water used to brew your coffee. If not cleaned, these minerals will negatively impact your coffee maker’s water flow and overall performance. This can happen whether you have hard or softened water, which refers to its level of mineral content.


