The Keurig Needle Maintenance Guide: Easy Cleaning Steps
People buy Keurig machines for the a really easy way to make a cup of coffee. While they may be very convenient during your busy mornings, they do require regular cleaning. Keurig needle maintenance is one of hte most important cleaning steps you need to do if you want to keep your brewer working at its best. Keep reading to learn how to clean Keurig needle (both top and bottom) to remove this buildup.
Why Is Keurig Needle Maintenance Important?
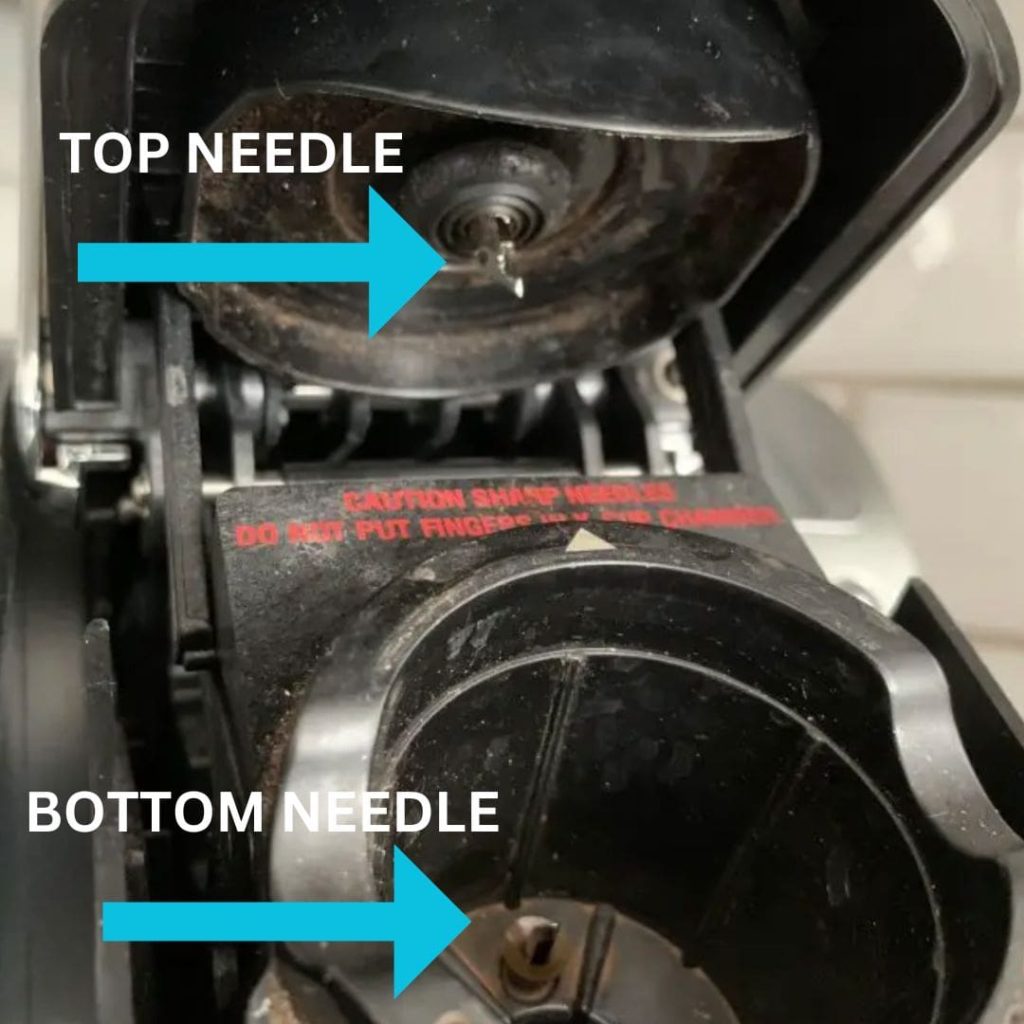
When you brew a K-cup, there are needles inside your coffee maker that make holes at the top and bottom of the pod. This allows hot water to pass through the capsule and make its way to your cup. The ground coffee in the pods can get stuck around this area.
If left there, they will turn dry and hard. This is more likely to happen if you don’t discard your pods soon after brewing. In addition to needle cleaning, using rinse pods can also help keep the chamber clean after a few brew cycles.
Signs That You Need To Clean The Needles
If your coffee starts to taste bitter, it is probably because old brewed coffee grounds are falling from the needle into your cup of coffee. You may even be able to see Keurig coffee grounds in your cup.
Another sign that you need to clean the needles is that your Keurig machine starts to take longer to brew, doesn’t make a full cup, or only drips slowly. The build up of coffee grounds in the needle will increase the time it takes for the filtered water to move through your brewer.
If needles are left dirty for too long, your Keurig may stop puncturing the K-cups, either at the top, bottom or both. In extreme cases, this cause major leaks as the water can’t make it through the pod.
2.0 models will display a message when performing cleaning is needed, including the water under pressure error.
What Supplies Do You Need To Clean The Needles?
For most Keurig owners, the only tool you will need to clean needles is a paper clip. Many people will have one of those lying around somewhere, which makes Keurig needle upkeep easy. If you have a Keurig 2.0 model, you can use or buy an optional cleaning tool. More on that below.
How To Clean Keurig Needle Using A Paper Clip
Follow these steps for Keurig needle maintenance, but use caution because they are sharp.
- Straighten one end of a paper clip.
- Turn off the brewer and unplug it and remove the water reservoir.
- Grab the sides of the K cup holder and remove it from the brewer by gently pulling away.
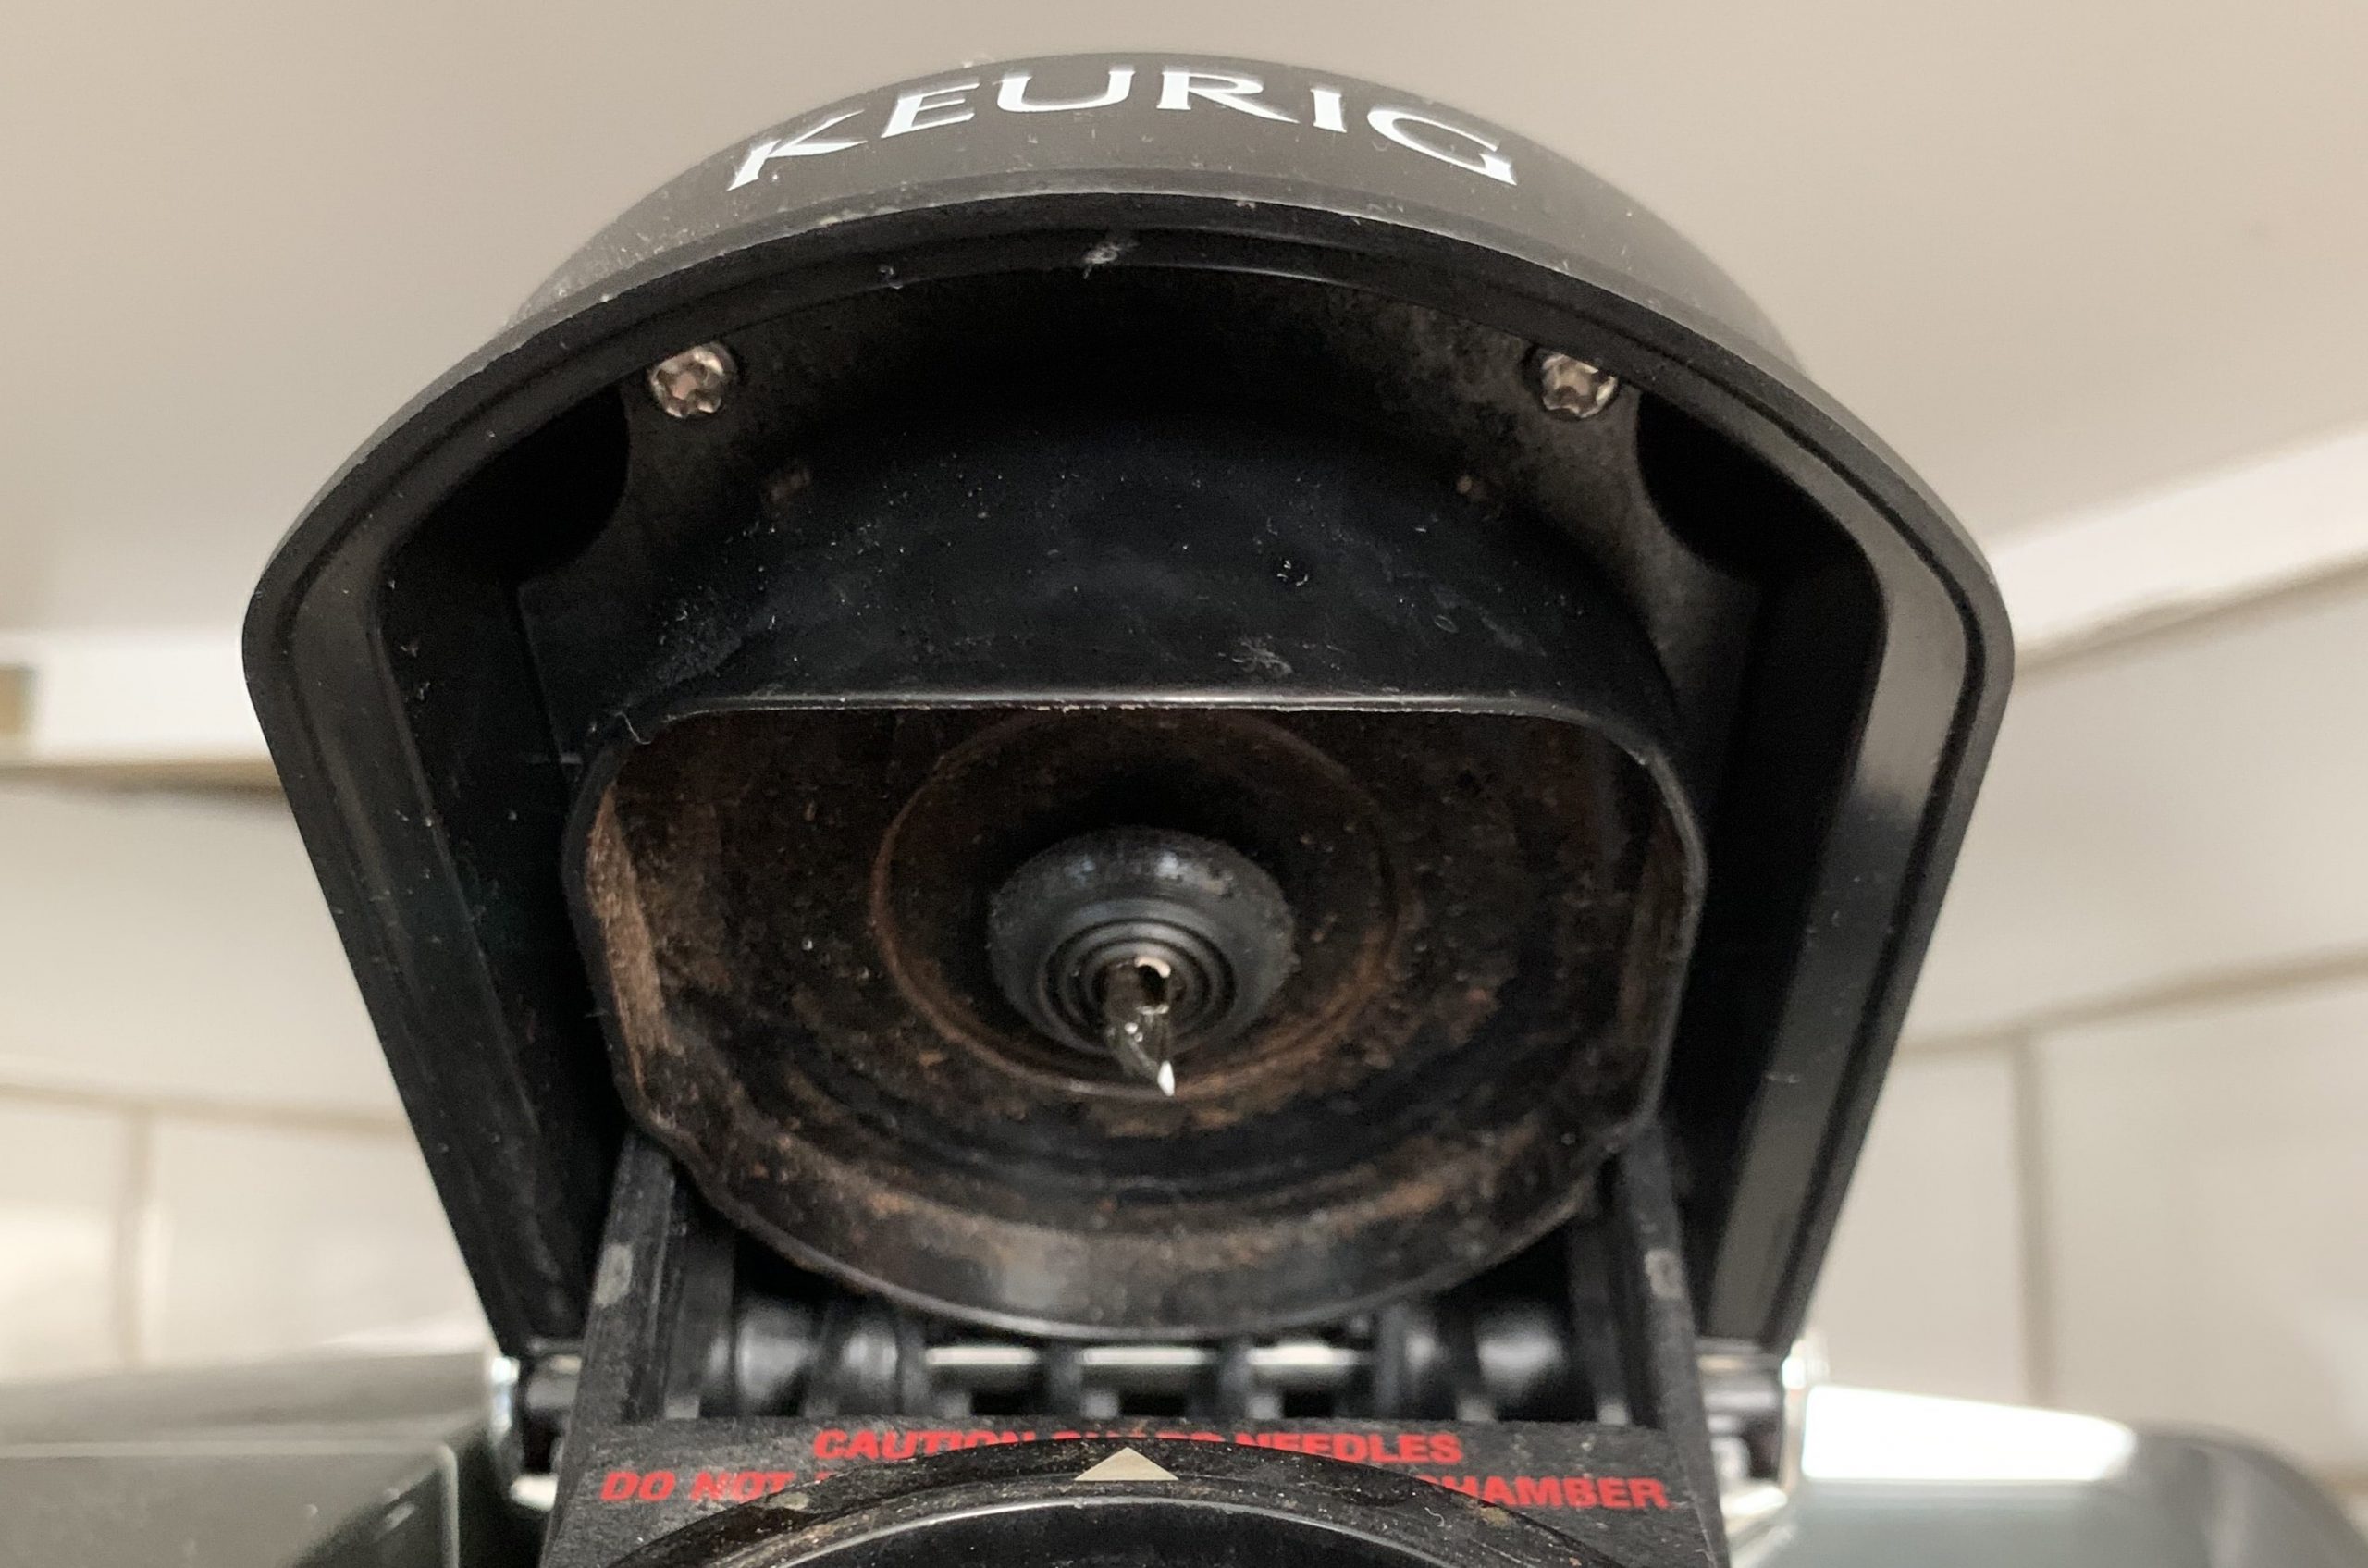
- Press the button on both sides to separate the holder from the housing. Push the lever to show the exit needle, then hold it down while flipping the holder over.
- Insert the straight end of the paperclip into the needle area and then move it around in a circle a few times to loosen any stuck grinds. Rinse the pod holder with clean water and set it aside to dry.
- Open the handle and look under to see the top entrance needle. Carefully insert the paper clip and move it around to clean. NOTE: If you are using a Keurig Supreme brewer, there are multiple needles because of the multistream technology. Insert a paperclip into each hole.
- Reinstall the pod holder and close the lid.
2.0 Keurig Needle Maintenance Using The Orange Cleaner
If you have a Keurig 2.0 machine, The easiest way how to perform maintenance is with the orange needle cleaner. Most models will come with one. However, if you lost yours you can buy a new one for just a few dollars.

- Turn off the power. Unplug the machine from the wall.
- Fill the silicone bulb in the middle of the orange tool with water.
- Lift the handle to open your brewer. Place the tool in the pod holder. Make sure the arrows on the ring point down. Push firmly down.
- Raise and lower the handle five times to draw out coffee grounds.
- Remove the orange tool. If you look inside the bulb, you’ll see the coffee grounds that were removed.
- Perform a cleansing brew. You can use only water and no pod or, preferably, you can insert a cleansing rinse pod. Use your touchscreen to brew a 6 ounce cup, letting the cleansing solution or hot water flow through the machine. When done, discard the cup’s contents.
- Clean the orange tool by washing with warm water and let it air dry.
- Put the K cup holder back into the machine. Make sure it clicks. Then put the water tank with water filter back in place.
Keurig Rinse Pods Can Help Keep Needles Cleaner
Over time, residue and oil from coffee grinds can build up in your coffee maker. A Keurig rinse pod is the quickest and easiest way to clean your K-cup pod holder, brewer funnel and exit needle. These Keurig cleaning pods contain a special formula that can clear away the leftover coffee residue and oils during rinse cycles.