How To Fix Keurig That Is Not Puncturing K-Cup Top Or Bottom

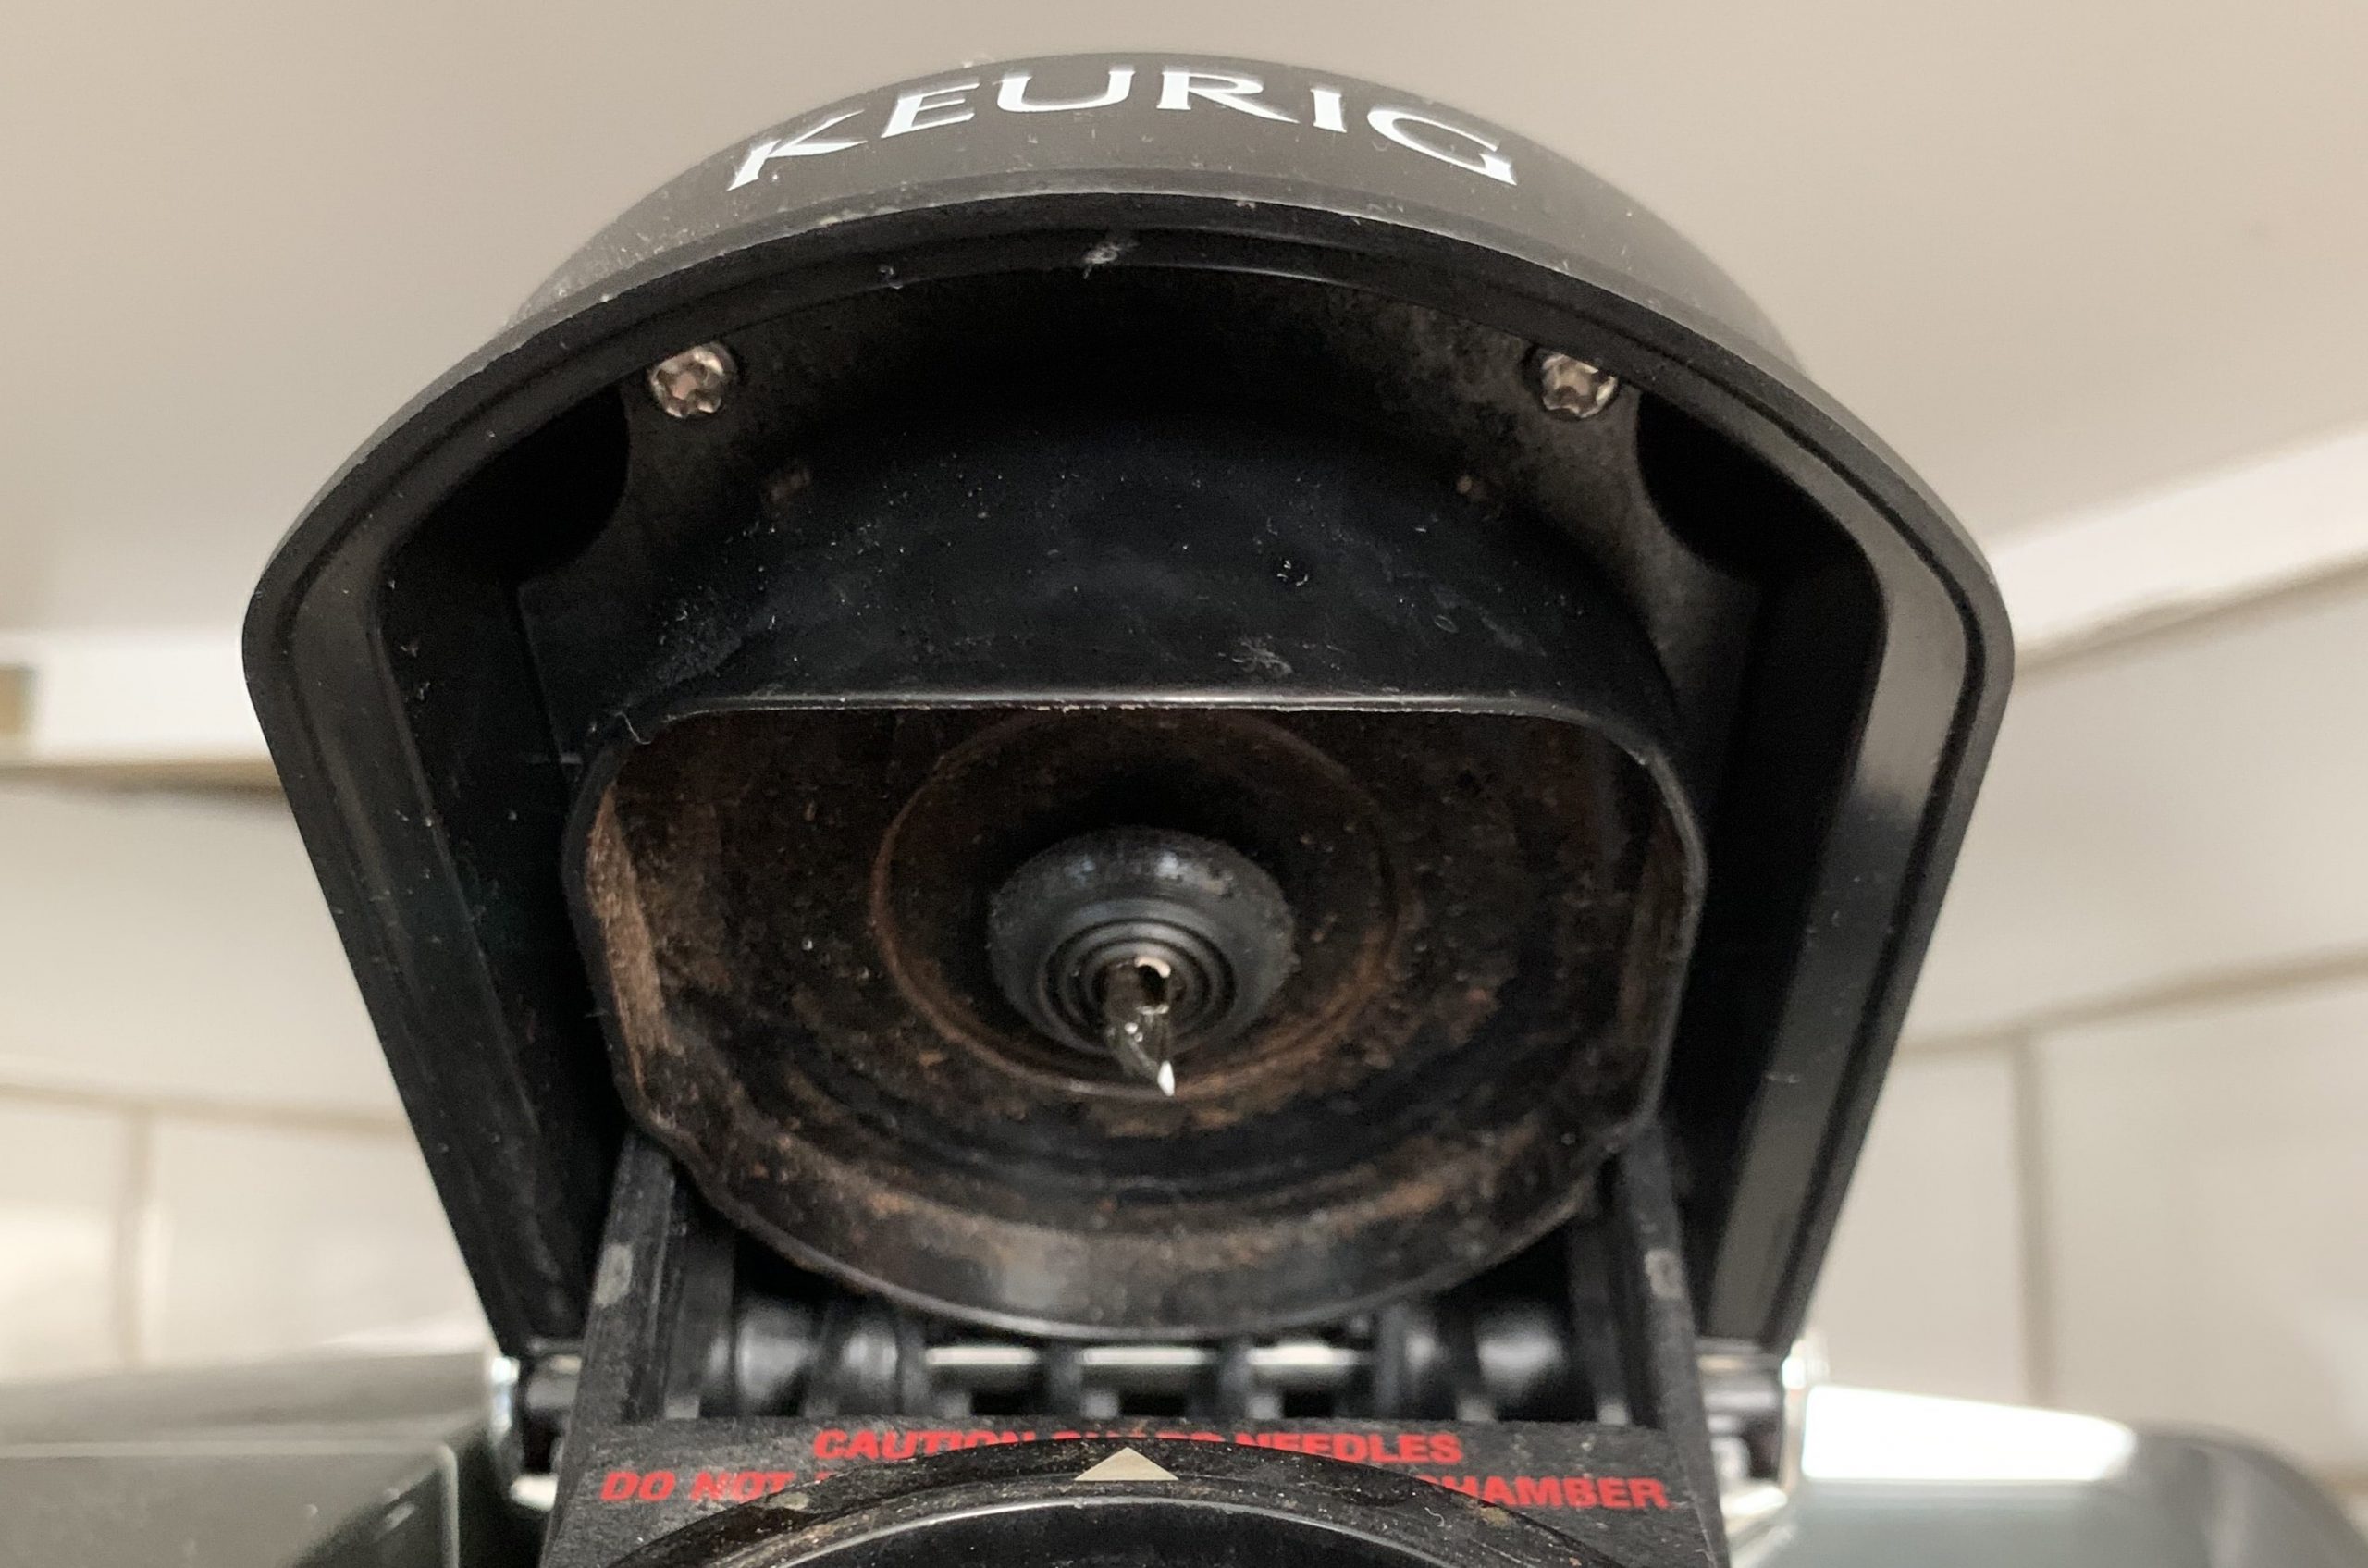
When you brew a K-cup, there are needles inside your coffee maker that make holes at the top and bottom of the pod. This allows hot water to pass through the capsule and make its way to your cup. If you don’t regularly clean your Keurig, old grinds can build up around these needles. This can make it harder for them to puncture or pierce the K-Cup pods. These needles may also break or get bent. If your Keurig top or bottom needle is not puncturing or piercing coffee pods, keep reading to learn some solutions.
Step 1: See If Keurig Needles Are Bent or Broken
First you’ll want to inspect the top entrance needle and bottom exit needle. If your Keurig is not puncturing or piercing coffee pods because a needle is bent or broken, then it isn’t worth trying to clean them. You’ll need a replacement needle gasket.
Inspecting the upper needle is easy. Just open up the brew head and look at the needle underneath. Make sure you can see it in good light. If it is pointing straight down, then the top needle is not broken and your Keurig should be puncturing the top of the K-Cups.
Checking the bottom exit needle is a bit more complicated.
- Turn off the coffee maker, unplug it and remove the water tank. Open up the brew head.
- Grab the sides of the K cup pod holder and remove it from the brewer by gently pulling away.
- Press the button on both sides to separate the holder from the housing.
- Push the lever to show the exit needle, then hold it down while flipping the holder over.
If the exit needle is bent or broken, you can replace the needle gasket with the one that is compatible with your machine. These parts are easy to install. The needles are sharp so please use caution!
Step 2: Clean Keurig Top And Bottom Needle
If your Keurig coffee maker top and bottom needle don’t look bent or broken but your machine still is not piercing or puncturing the pods, then old grinds stuck to the needles may be dulling them. You’ll want to clear the grinds using one of the methods below (depending on your model). If this fixes the problem for you, be sure to run a cleaning cycle regularly to reduce the chance that this issue happens again.
Paper Clip Method (All Models)
Follow these clear any old grinds stuck to your Keurig top and bottom needles. Please use caution around the sharp needles!
- Straighten one end of a paper clip.
- Turn off the Keurig and unplug it and remove the water tank.
- Grab the sides of the K cup pod holder and remove it from the brewer by gently pulling away.
- Press the button on both sides to separate the holder from the housing. Push the lever to show the exit needle, then hold it down while flipping the holder over.
- Insert the straight end of the paperclip into the needle area and then move it around in a circle a few times. Rinse the pod holder with water and set it aside to dry.
- Open the handle and look under to see the top entrance needle. Carefully insert the paper clip and move it around to clean.
- Reinstall the pod holder and close the lid.
Orange Needle Cleaner (Keurig 2.0 Only)
If you have a Keurig 2.0, then the easiest way how to clean out your needles is with the orange needle cleaner. Most models will come with one. However, if you lost yours you can buy a new one for just a few dollars.
No products found.
- Turn off the power. Unplug the machine from the wall.
- Fill the silicone bulb in the middle of the orange tool with water.
- Lift the handle to open your brewer. Place the tool in the pod holder. Make sure the arrows on the ring point down. Push firmly down.
- Raise and lower the handle five times to draw out coffee grounds.
- Remove the orange tool. If you look inside the bulb, you’ll see the coffee grounds that were removed.
- Perform a cleansing brew. You can use only water and no pod or, preferably, you can insert a cleansing rinse pod. Use your touchscreen to brew a 6 ounce cup, letting the cleansing solution or hot water flow through the machine. When done, discard the cup’s contents.
- Clean the orange tool by washing with warm water and let it air dry.
- Put the K cup holder back into the machine. Make sure it clicks. Then put the water tank with water filter back in place.
Amazon Item Images and Prices Last update on 2025-06-20 / Affiliate links / Images from Amazon Product Advertising API


I have the new Keurig machine with the 5 pins that puncture the top of the pod and one pin on the bottom. I have tried several different pod brands and I get a cup of hot water every time. Its clean and I can fill the additional pod that you fill with ground coffee and I get a great cup of coffee. What is wrong. I loved it so much I bought my daughter rite away. Please help!!! 631-395-0839
Hi! When you take the “used” K cup out of the machine does it have five holes in the top and one on the bottom? If not, I would suggest calling Keurig support. Also, have you tried using K Cups made by Green Mountain?