How To Prevent Nespresso Aeroccino Milk Frother From Leaking, Overflowing & Spilling Over
Many new owners of the Nespresso Aeroccino milk frother run into a problem where milk is overflowing, leaking or spilling out from the lid at top of the jug. If that is why you are here, the good news is that there is nothing wrong with your frother. You can avoid this happening again just be learning a few simple things about how to use the Aeroccino correctly. Keep reading to learn more.
Understanding the Difference Between Steamed and Frothed Milk
Before I explain how to fix the overflowing problem, it is important to understand that you can use the Nespresso Aeroccino to prepare milk in two different ways: steamed or frothed. The choice between steamed or frothed milk comes down to the type of espresso-based drink you are trying to make. Do you want a cappuccino or a latte? If you want a cappuccino with a thick layer of cloud-like milk foam, then you need to froth your milk. If you want a latte, which has espresso and milk more mixed together vs a cappuccino, then you need to steam your milk. The Nespresso Aeroccino can do both if you know how to use it correctly.


How To Use Nespresso Aeroccino Milk Frother Correctly So It Doesn’t Overflow or Leak
Step 1: Choose the whisk
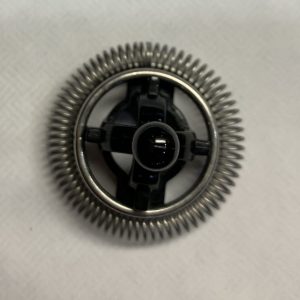
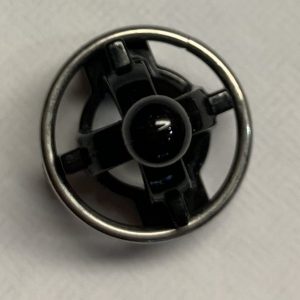
Look inside you Aeroccino jug and you will see a whisk that magnetically attaches to the base. There is a coil around the whisk that is removable. The option to remove
If you want to froth milk for a cappuccino, leave the coil ring around the whisk. If you want to steam for a latte, simply pop off the coil ring and put it aside. It will take just over a minute to froth and just over two minutes to warm.


Step 2: Fill To The Correct Max Line
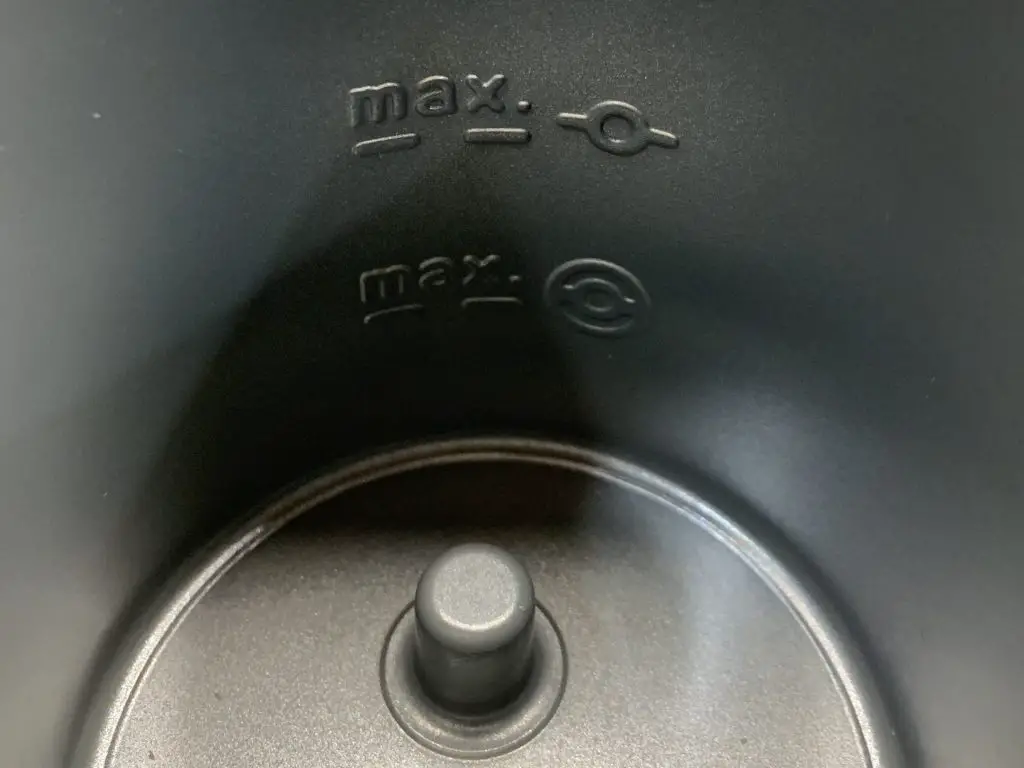
If you look inside your Nespresso milk frother jug, you’ll see that there are two MAX lines. That’s confusing! You have to look very carefully to see that there is a different symbol next to each of the MAX lines. Do they look familiar? The bottom symbol is meant to be the whisk with the coil around it. The top symbol is meant to be the whisk without the coil.
The most likely reason that your Nespresso milk frother has been overflowing, leaking or spilling milk because you have filled to the upper MAX line while using the coil around the whisk. If you are using the coil ring to froth, never fill above the lower max line otherwise it will overflow. If you are not using the ring, you can fill to either max line depending on the size or number of drinks you are making and how much milk you want.

Other Helpful Content About the Nespresso Aeroccino Milk Frother
After reading this article, you have learned the most important thing about how to use your Nespresso frother. The article linked in the previous sentence has other information that will help you learn about all of the functionality of your Aeroccino, including how to prepare milk cold instead of hot. It also suggested steps on how to care for your Nespresso frother and keep it clean. Taking good care of it is really important! If you don’t regularly clean it or know how to use it properly, you can end up with troublesome red light errors.

