How To Clean A Keurig For The Best Tasting Coffee
Are you a new owner of a Keurig coffee maker looking for advice on ways to clean it and keep it working at its best? We’ve got you covered.
Or maybe you have been using your Keurig coffee machine for a few months and are starting to notice that something isn’t quite right. For example:
- The taste of your coffee is unusually bitter, burnt or metallic
- There are grinds in your cup of coffee
- Your Keurig’s lights have started blinking
- The temperature of your drink is cooler than usual
- The amount brewed is less than a full cup
- Your machine is not pumping water at all and needs to be primed
- The Keurig keeps shutting off when you try to brew a K-cup
Keurig recommends regularly cleaning your machine. If you haven’t been doing that, well… better late than never! Keep reading to learn how to clean a Keurig coffee maker.
How To Clean a Keurig Daily
I suggest you follow these steps daily no matter what model you have. Your coffee maker will be OK if you forget a few days (I’m guilty of it too). However, the more often you can do it, the better off your machine will be in the long run.
This first tip is the most important. Always eject used K-cups right after brewing. Never leave them in the holder. If you do, coffee grinds can get stuck there leading to a burnt or bitter taste in your next cup. Then, when you are done using the machine for the day, run the machine through a fresh water only brew cycle with no K-cup in the unit to rinse out any grinds that may have been left behind.
Use fresh, plain water when filling the reservoir. Also, empty the drip tray to prevent overflowing and bacteria buildup. Wash that and other removable parts with warm soapy water by hand. Let them air dry. If you have a K-Latte or another Keurig with a milk frother or steamer component, you will want to wash those pieces thoroughly.
How To Clean A Keurig Weekly
Use a rinse pod to remove any coffee residue or oils from inside the machine every week. If not, residue and oil can build up in your brewer over time. A rinse pod is the easiest way to clean your K-cup pod holder. These pods contain a special formula that can rinse away the leftover coffee residue and oils.
After the rinse cycle, take a cloth that is damp with warm water or a mild cleaner to wipe down the outside of the machine. Wipe under the coffee outlet too. Never use any strong cleaning agent.
If you have a 2.0 model, you should also wipe down the touch screen every week. Wipe along the edges. This will prevent dust and other debris from building up that could make the touch screen stop working.
Monthly Keurig Maintenance
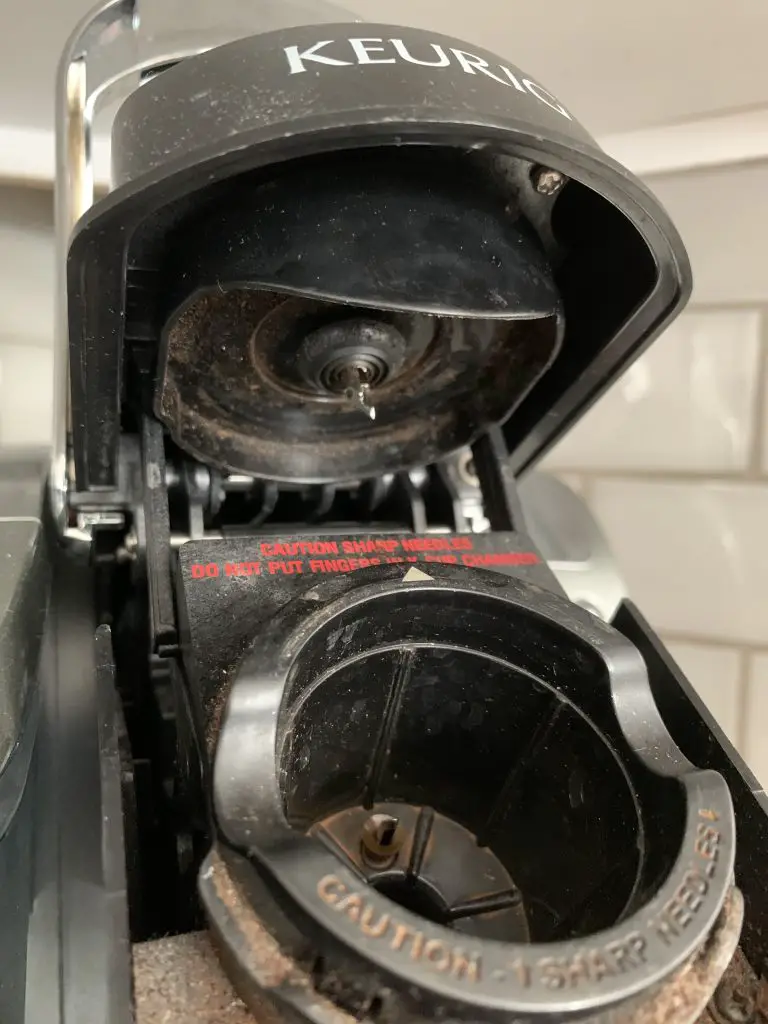
When you brew a K-cup, there are needles inside your coffee maker that make two holes in the pod so water can pass through. The grounds can get stuck around the needle and become dry and hard. This is even more likely to happen if you don’t remove your pods soon after brewing.
Every month, you will want to take the time to clean the entrance and exit needles. My related post on this topic will walk you through the needle maintenance steps, using either a paperclip or, if you have a Keurig 2.0, the orange accessory that came with your brewer.
- Straighten one end of a paper clip.
- Turn off the brewer and unplug it and remove the water reservoir.
- Grab the sides of the K cup holder and remove it from the brewer by gently pulling away.
- Press the button on both sides to separate the holder from the housing. Push the lever to show the exit needle, then hold it down while flipping the holder over.
- Insert the straight end of the paperclip into the needle area and then move it around in a circle a few times. Rinse the pod holder with water and set it aside.
- Open the handle and look under to see the top entrance and exit needles. Insert the paper clip in each and move it around to clean.
When you finished with the needles, you can clear the rest of the pod holder. Take a small, soft brush (like a spare toothbrush), add water to it, and gently scrub away at any grinds you see on the top and bottom of the chamber. Be careful around those sharp needles!
Replace Water Filters Every 2 Months
Most Keurig brewers have a charcoal water filter. The filter helps remove mineral deposits and other impurities from the water used to brew your K-cups. You should replace the filter every 2 months or every after using 60 full water tanks. Try to keep track of how many times you fill the water reservoir. Learn how to replace the water filter.
Since the it helps remove impurities, changing the filter at the suggested time or more often is the best thing you can do to keep your coffee tasting as good as it did on day one. Your machine will still brew coffee without one. However, over time the lack of one can lead to the buildup of minerals in your machine. As a result, you’ll need to descale your machine more often than owners who do use water filters.
Descale Keurig Every 3 Months
You should descale your brewer every 3 to 6 months. If you have hard water, meaning it has a higher level of minerals, you should do this more often. This deep clean will remove limescale buildup inside your machine. If not done regularly, this can cause problems over time with water flow, water pressure and temperature. Learn how to descale a Keurig coffee maker, with steps for each model. You’ll need to buy a descaling solution.

This safe descaling formula has no odor and acts fast to remove mineral build up with gentle citric acid. Using this solution won’t cause any harm to your brewer. You can buy the solution alone or as part of a bundle with rinse pods and filters that will also help you keep your machine clean. If you have the K-Duo model, be sure to check out this K-Duo bundle.
If you are an Amazon prime member, these items are eligible for fast, free shipping. However, you can also find the official Keurig solution in stores. Target sells it in store and online. You can also find the solution at Walmart and Bed Bath and Beyond.
Descale Steps For Traditional Brewer Group (Elite, K-Classic, K-Café, K-Latte, K-Compact, K-Select)
- Empty the water tank and K-cup pod holder. Make sure there are no coffee pods in the brewer.
- Pour the solution into the empty tank
- Fill the empty bottle with water and pour into the tank.
- Place a large mug or bowl on the drip tray
- Rinse the machine by lifting and lowering the handle and then selecting the largest brew size option.
- Repeat the rinsing step #5 until the ADD WATER indicator light is lit on your machine.
- Let the brewer rest unused for 30 minutes. Allow it and any washed parts to air dry.
- Rinse the tank. Fill the water reservoir to MAX line with fresh water and do 12 more rinsing brews (step #5).
Descale K-Mini Series (K-Mini, K-Mini Plus)
- Empty the water tank and K-cup pod holder. Make sure there are no coffee pods inside.
- Pour one third (4.6oz) of the solution into the tank.
- Add fresh water to the tank until it is filled to the 10oz level.
- Rinse the machine by lifting and lowering the handle and then pressing the button to start the brew cycle.
- Repeat steps 3 & 4, but this time when the hot water solution mix begins to come out turn the machine off by pressing the power button.
- Let the brewer rest for 30 minutes.
- Press and hold the brew button so that the water-solution mix will begin to come out again. Keep holding the button until all the solution has been dispensed.
- Fill the tank with a full cup and a half of fresh water up until the 12oz fill line.
- Press the brew button.
- Repeat step 8 & 9 two more times.
How To Deep Clean Keurig Supreme (K-Supreme, K-Supreme Plus)
- Empty the water tank and K-cup pod holder. Make sure there are no coffee pods inside.
- Pour the solution into tank
- Fill the empty bottle with water and pour into the tank.
- Place a large coffee mug or bowl on the cup holder.
- Power off the brewer and pressing down the 8oz and 12oz buttons at the same time for 3 seconds.
- When flashing begins, press the brew button to start the process.
- Repeat step 6 until the ADD WATER indicator light turns on.
- Rinse the tank. Fill it to MAX line with fresh water and press the brew button to start the rinsing process.
- Repeat the rinsing process until the light turns off.
Why Cleaning With Vinegar Is A Bad Idea
Keurig warns that you should not descale with vinegar or lemon juice. White vinegar has 5-8% acetic acid. Apple cider vinegar and lemon juice have 5-6%. This can wear down metal and cause leaks.
Using a DIY solution with vinegar or baking soda to descale can void the warranty. You also don’t want a vinegar taste or smell in your cup of hot coffee. The best way to clean is with a descaling solution that contains safer types of acids that won’t cause damage or change the taste of your drink.